In this section we use the HTML style system to make the text on the page more attractive. We shall make headings stand out, and adjust sections of text for added impact. There are two ways of adding effects - one for adding the effect whilst entering the text, the other for putting an effect on afterwards.
|
1) If you don't already have the page you created in
Session 2 loaded into HTMLEdit, either drag the
file you saved onto the HTMLEdit icon on the
iconbar, or copy the Session2 file into the Tutorial
directory and use that.
In fact, the majority of the icons on the toolbar are for adding effects and styles to the text. Several even have buttons dedicated to them:
First, let's use the Centre button (third from the right on the bottom row of icons)...
2) Click once just before the text 'A simple HTML page' (after <BODY>). Now, either press the right mouse button just after the text, or drag with select held down until you reach the end of the phrase. The text should be displayed in white against a black background. The particular text is now said to be 'selected' or 'highlighted'.
3) Point to the Centre button, and click select once. The program will wrap the selected text in <CENTER>...</CENTER> tags. When viewed in a Web Browser, this text will appear centred.
You will notice that the American spelling of ‘center’ is used. Since most non-Acorn Web Browsers originate in the USA, they only support <CENTER>. UK browsers tend to support either spelling, so HTMLEdit uses the American version.
4) Click on the Preview Page button to see the page in a Web Browser, with the text centred as you would expect.
All styles and effects can be added in this manner - highlight the text, then click on the style. If we had clicked on the style or effect without selecting any text, HTMLEdit would have inserted the tags at the caret position. The caret would then have been moved to just after the opening tag, so that the new text could be entered in that effect.
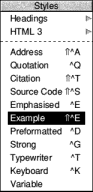
Our next task is to change the size and typeface of the heading. HTML doesn't contain direct references to fonts, as the range available will differ from machine to machine. Instead, there are a variety of predefined styles, which the Web Browser maps to the fonts available on the user's computer.
5) Select the same text as before ('A simple HTML page') - you might try using the alternative way of highlighting text described in step 2.
|
|
6) Click on the Styles button. A menu will be
displayed - slide to the right off Headings, to
the six different heading styles. Since the text we
have highlighted is the main title, click on Heading
1. Our text has the appropriate tags wrapped
round it.
If you are keen to see what the page looks like, you can Preview the page now. Otherwise you can continue with this section and add some more effects.
7) Highlight all of the poem, but not its title. Since this is actually a quotation from elsewhere, we should apply the Blockquote style to it.
8) Click once on the Styles button to bring up a list of available styles. Click on 'Quotation' and the the tags will be inserted.
9) Finally, select the title of the poem - 'Hiawatha's Departure', click on the Styles button and apply the Strong effect. Some would argue that it would be better to use a Heading style, perhaps Heading 5 or 6, but Strong seems to work well here.
10) Click on the Preview Page button to finally see your page in all its glory.
|
One of the most important facilities provided by HTML is the ability to connect one page to another via hypertext links, or 'anchors'. As we head towards the end of our tutorials, we shall create some links both to external documents and to positions within the current document.
|
1) If you don't already have the page you created in
Session 3 loaded into HTMLEdit, either drag the
file you saved onto the HTMLEdit icon on the
iconbar, or copy the Session3 file into the Tutorial
directory and use that.
First, we shall create a simple link to another Web site.
2) Highlight the text: 'World Wide Web' at the start of the first paragraph.
3) Click with Select over the Hypertext Anchor button in the toolbox. This will bring up the dialogue box for setting up links to other documents.
4) In the URL field, type in the following:
5) Click on OK, and the text will be wrapped up in the anchor tag with the destination set to the above URL. This particular page provides information on the WWW itself.
6) Click on the Preview Page button in the toolbox. You should see the text: 'World Wide Web' displayed as a link, but unless you are logged onto the Net at the time, clicking on the link won't take you to the page. However, a user accessing your page over the WWW would be logged on, so the link would work. Next we shall create a link to a specific page on a Web server.
7) Close the preview in the Web Browser. This time highlight the text 'Mike Oldfield' towards the end of the second paragraph of text.
8) Click on the Hypertext Anchor button to bring up the Anchor setup dialogue box, and set the URL to:
This is certainly a long and complicated URL! The page is referred to by the site name (because the page doesn’t reside on the server that your page will be running on) followed by the UNIX path of the page. So, in this case, the page is in the directory mike_oldfield within the ~pettypi directory on the Web server.
When creating your own pages, remember to use UNIX path names. If you are linking to another of your own pages, you will probably not need the site name on the front, just a UNIX path relative to the current page. Note that you can simply drag a page into the window from your hard disc, and HTMLEdit will do its best to create the path automatically for you.
9) Clicking on the OK button will create the link, which can then be used when viewed in the Web Browser, if you are logged on.
Finally, we shall create a link from the top part of the document to a point lower down.
10) Click once in the text, just before '<STRONG>Hiawatha's Departure'.
11) Click on the Anchor button in the toolbox, and set the Name field to:
12) Click on OK to insert the tag into the text. This marks the point of insertion as 'poem', so that you can link to it from within the document or from other documents.
13) Highlight the whole of the image tag for the second image: '<IMG SRC="Image2.gif" ... >'. We shall link this image to the poem marker in the text.
14) Click once on the Anchor button in the toolbox, and set the URL field to:
This sets up a hypertext link to the 'poem' marker. If you wanted to link to a marker in a page on another Web server, you would simply suffix #marker (where marker is the marker name) to the URL of the page.
15) Finally, click on OK to insert the tag, then press F3 to save your page.
16) If you now click on the Preview button, you can try this final link out, since you don't need to be logged on to the Net to activate links to local markers.
|
Frames are a device to add more options to the web page, and as such are frequently overdone. Used sparingly, they can improve the appearance of a page, and aid navigation around the site as a whole. However, if misunderstood, they can create confusion.
Frames exist within a Frameset and there are various rules which apply. Framesets can only consist of framessharing the same left/right or top/bottom edges. They can only be of a certain direction, horizontal or vertical, but horizontal frames can only be split vertically, and vertical frames, horizontally. The application Framer which is part of the HTMLEdit ‘Web Designer’s Toolkit’ conveniently shields you from many of the more arcane properties of frames while enabling you to create framesets and subsets which can overcome most problems, but you have to apply some rational design rules if you wish to make your pages look their best.
To Use Framer, click over its icon once you have loaded the application, and you will be presented with a main window representing a browser running in 640 x 480 resolution, and displaying one large frame. Two buttons to the far left of the toolbar allow you to start splitting up the large frame into subframes to suit your design. The third button allows you to set the properties of the frame. All frames should be given names, and this enables you to click on a link in one frame to display a document or graphic in another. If you wish to link to a document larger than its frame, you can make it scrollable by simply selecting this option, then scrollbars will appear at the right and bottom of the document in the frame, so that the document can be read by the user. On the Automatic option, the scroll bars will only appear if the document is larger than the frame. Margins can be set so that the contents of the frame are inset, useful for text set to emulate columns. However, you must remember that these are separate documents, and text cannot be made to flow from one to another as in a page creation program.
Frames may be used to contain text, pictures, graphics, Forms, or links, either tagged to copy or bitmaps or even parts of bitmaps, so they do open up your creative options considerably. With careful planning and the skilful creation of subsets, you can position elements and objects almost anywhere that you want them, enhancing the look of your pages considerably. A popular and sensible way of using forms is to position a ‘button bar’ either at the bottom , left side or top of the page, which contains within it clickable links to detailed information summarised on the index page. Thumbnail pictures can be selected to reveal full- size versions; headlines can be tagged to stories, so your page becomes more easily ‘browseable’. Anything which gives the visitor to the page the option of going where he wants, at the speed he likes will increase the impact and popularity of your site.
A main menu accessible from the icon bar enables you to file, delete and set frame properties, and you are able to save both as a full HTML page complete with header, ready for dropping into your master directory, (Create WWW Page), or as frame code only, which you may like to store in your Masterpage Database.
A more detailed and illustrated guide to Frames can be found in the Web Designer’s Toolkit Reference section.